
Duct Insulation Installation: Wrap, Board, and Liner Methods
Duct insulation installation typically uses one of three methods: external blanket wrapping, external insulation boards, or internal duct liners. Flexible wraps follow round, rectangular, and irregular metal ducts. Boards provide a flat insulation layer for rectangular ductwork and plenums, while internal liners are primarily selected where sound absorption is required within the duct.
The installation method determines how the material is fixed, joined, and finished. Across all three methods, the insulation must retain its specified installed thickness and remain continuous at seams, corners, and connections. Cold ducts also require appropriate vapor control to limit moisture reaching the chilled metal surface.
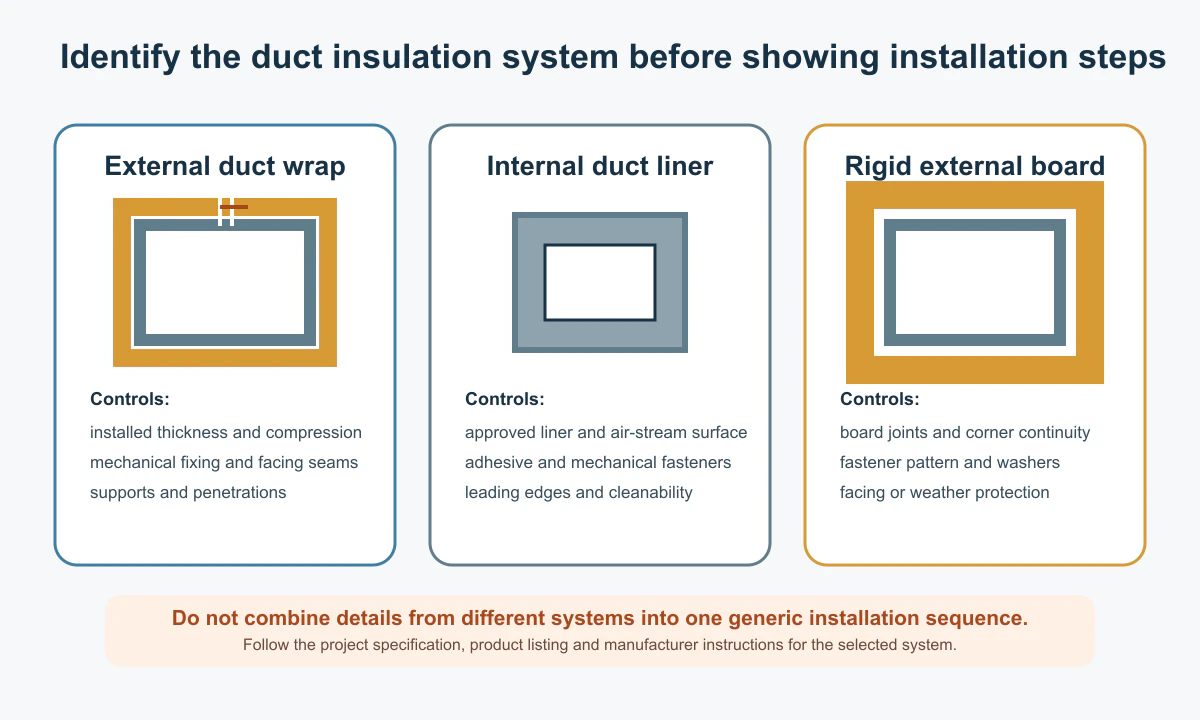
Three installation priorities
- Select the system Confirm external wrap, external board, or a purpose-made internal liner before work begins.
- Maintain continuity Account for corners, flanges, access doors, hangers, seams, and penetrations.
- Inspect before concealment Check installed thickness, fastening, vapor control, and exposed edges.
Check the Duct and Insulation System Before Installation
Before duct insulation installation begins, complete duct fabrication, assembly, and air sealing. The metal surface should be clean and dry, without standing water, loose debris, or oil that could interfere with adhesive bonding or mechanical attachment.
For duct insulation installation, confirm insulation form and thickness against operating temperature, surrounding humidity, duct geometry, and location. Cold supply ducts need special attention to vapor-retarder continuity; outdoor ducts require separate weather-resistant and mechanical protection.
| Installation method | Typical application | Main installation considerations |
|---|---|---|
| External wrap | Round, rectangular, and irregular metal ducts | Cutting allowance, installed thickness, seam closure, and prevention of sagging |
| External board | Rectangular ducts, plenums, and broad flat surfaces | Board contact, mechanical or adhesive fixing, joints, and corners |
| Internal liner | Metal ducts requiring sound absorption | Air-stream surface suitability, bonding and fasteners, and leading-edge protection |
For material applications, see Air Duct Insulation. Round & Rectangular Duct Insulation explains geometry-specific considerations.
Installing External Insulation Wrap
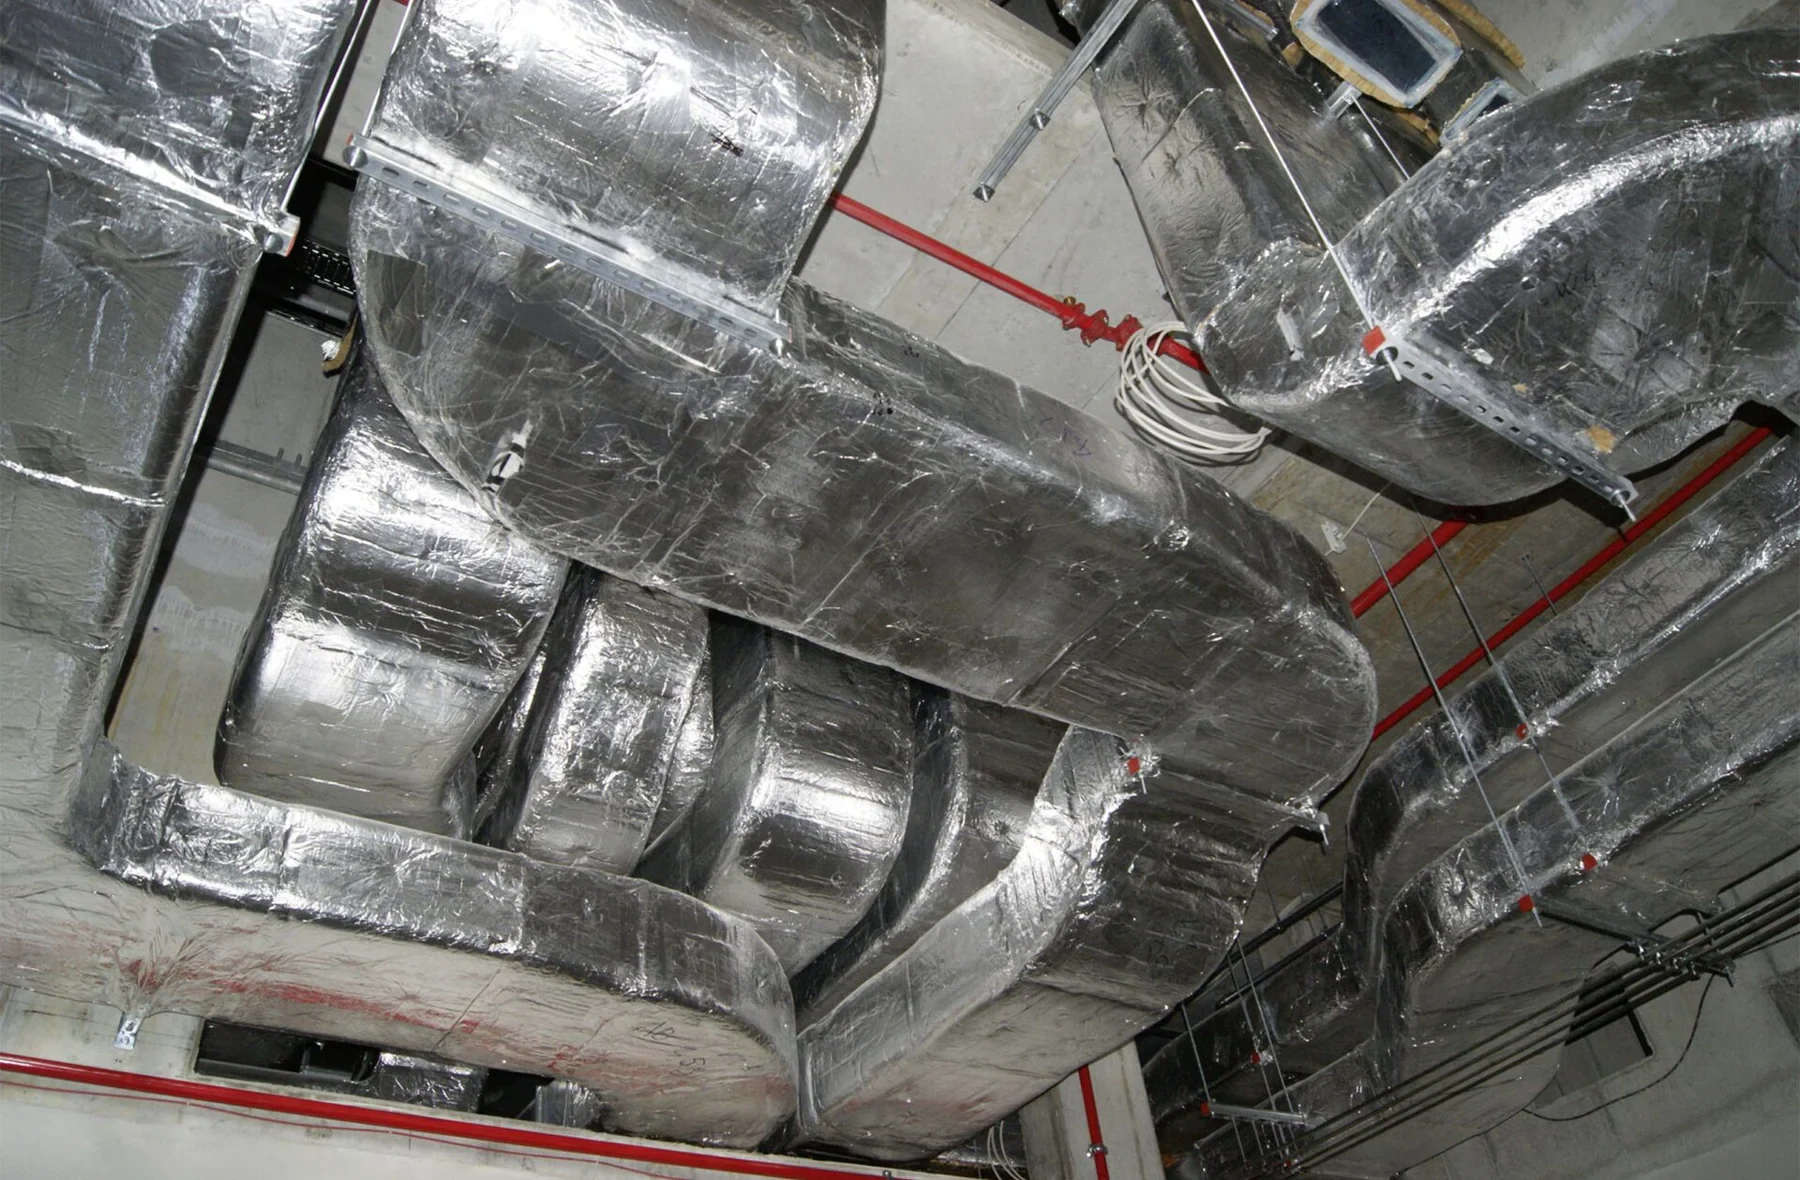
Flexible glass wool blankets follow curved, rectangular, and shaped ductwork. Foil-faced versions can form part of a vapor-retarder system when the facing and all required joints are correctly sealed. For external-wrap duct insulation installation, follow the sequence below to avoid gaps, compression, and loose sections.
1. Measure and cut the blanket. For duct insulation installation with wraps, measure the duct perimeter and allow for the added path around the insulation thickness and the facing overlap; do not cut solely to the bare-metal perimeter. An overlap of approximately 50 mm is common in some foil-faced systems, but the required dimension depends on the specified facing and joint detail. An undersized cut can stretch and compress the blanket.
2. Position the wrap without reducing thickness. Fit the insulation evenly with the foil facing outward. Keep close, consistent contact on round ducts without leaving loose areas. On rectangular ducts, avoid drawing the blanket tightly across corners. Installed thickness, rather than the blanket's nominal thickness before fitting, determines the thermal resistance achieved.
3. Close and seal the joints. Butt adjoining insulation edges together without exposing metal. Close facing laps with compatible foil tape or the specified sealing system. For cold-air duct insulation installation, keep longitudinal and circumferential seams, cut edges, and penetrations sealed so the facing remains a continuous vapor retarder.
4. Secure the blanket. Use suitable insulation pins, straps, or compatible fasteners to prevent movement and sagging. Wide rectangular duct undersides may require additional support. Hold the wrap without excessive compression, and seal fastener penetrations wherever vapor control is required.
5. Finish fittings and terminations. Use fitted pieces around elbows, transitions, tees, and flanges instead of forcing one blanket over complex shapes. Repair damaged facing, cover exposed metal, and finish joints before concealment. Outdoor applications need suitable protective covering in addition to ordinary indoor foil facing.
Insulvora supplies Foil Faced Glass Wool Roll in thicknesses from 25 to 100 mm, with foil and reinforced-facing options for applicable duct-wrap assemblies.
Fixing External Insulation Boards
External boards suit rectangular ducts, plenums, and broad metal panels where a relatively flat insulation surface is needed. The correct duct insulation installation method depends on whether the selected material uses mechanical fastening or adhesive bonding, and on the required joint and vapor-control details.
Glass wool boards. Cut semi-rigid or rigid boards to fit the individual duct faces, keeping adjacent edges closely butted. Weld pins and washers, or another compatible mechanical fixing method, help prevent slipping, lifted edges, and sagging. Do not excessively compress the material beneath fasteners. At corners, cut and arrange the boards to maintain coverage; on cold ducts, seal the vapor-retarder facing at joints, corners, and penetrations.
Insulvora's Glass Wool Board range includes thicknesses from 20 to 130 mm, with different density and board-size options for suitable flat-surface assemblies.
Closed-cell rubber foam boards. These are another external insulation option for cold ducts and humid environments. Cut sheets to the duct faces and fittings. Where bonding is specified, prepare the metal, apply adhesive according to the selected bonding system, and press sheets into place without voids or loose areas. For cold-air duct insulation installation, bond and seal adjoining edges using products compatible with the foam, especially at corners and penetrations where moisture could reach the metal.
Insulvora offers Self-Adhesive Rubber Foam Board for compatible bonded applications and Foil Faced Rubber Foam Board where a foil-faced product is preferred. Glass wool boards and rubber foam sheets require different fixing and sealing methods; they should not be treated as interchangeable installation systems.
Installing Internal Duct Liners
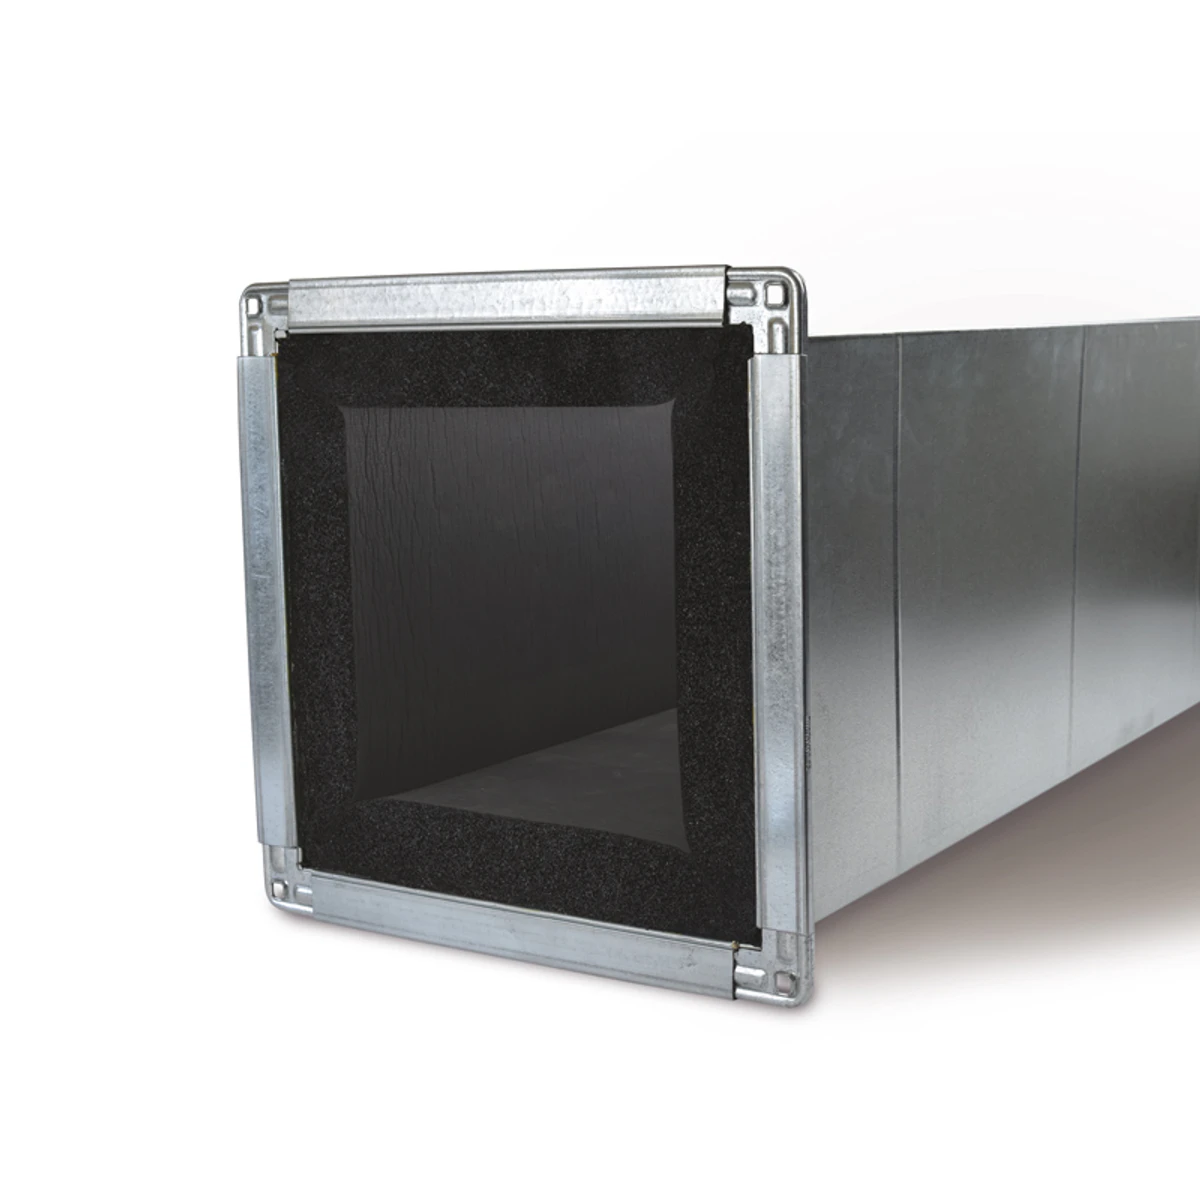
Internal liners are installed on the air-stream side of sheet-metal ducts, mainly to absorb fan and airflow noise while also contributing thermal insulation. Unlike external duct insulation installation, these materials are directly exposed to moving air. Their surface condition, attachment, and edge protection are therefore critical.
Fit and secure the liner. Clean the duct interior and complete the metal-joint air sealing. Cut the liner to the internal dimensions, maintain its specified thickness, and keep the exposed surface smooth. Fibrous-glass liner assemblies generally use both an appropriate adhesive and mechanical fasteners. Bonding provides contact; fasteners help prevent loosening during service. Avoid excessive compression and unnecessary projections into the airflow.
Treat seams and leading edges. Locate longitudinal joints as required by the liner system, often near duct corners. Finish transverse seams and exposed fiber edges using the specified treatment. Protect leading edges where airflow strikes them, including at lined-to-unlined transitions and near fan outlets, with details suitable for the design velocity and assembly.
For internal duct insulation installation, liner thickness reduces available duct area and can affect air velocity and pressure loss. These effects must be considered when sizing the duct and selecting liner thickness. Ordinary external glass wool rolls or boards cannot automatically be used as internal liners; the material and assembly must be intended for air-stream exposure.
Maintain Insulation Continuity at Fittings and Supports
Fittings, frames, and support points interrupt otherwise straightforward duct surfaces and can leave hidden insulation gaps. During duct insulation installation, these details need their own fitted pieces, closures, or support arrangements rather than the treatment used on a straight run.
Corners and transitions. Match cut pieces to the actual geometry, preserving coverage where wraps change direction or board faces meet. Avoid thin, compressed corners and open board joints.
Flanges and connectors. Raised flanges, stiffeners, and connections can create thermal bridges. Shape or build up the insulation to cover exposed metal while maintaining the intended installed thickness.
Hangers and supports. Support the duct without permanently crushing the insulation. Where the duct is cold, maintain the vapor-retarder seal around support details and penetrations.
Access panels and equipment connections. Keep dampers, inspection doors, and serviceable equipment accessible. Provide separate, complete insulation closures at openings rather than leaving cold metal unprotected.
For related metal-duct details, see Metal Duct Insulation.
Vapor Control and Condensation on Cold Ducts
On cold supply ducts in warm, humid air, condensation can occur when the outside insulation surface falls below the ambient dew point. Moisture entering through unsealed joints can also condense out of sight against the chilled metal. A reliable duct insulation installation therefore needs both adequate installed thermal resistance and vapor control suited to the operating conditions.
For foil-faced glass wool duct insulation installation, the facing and its joint seals must work as one continuous vapor-retarder layer, including at fittings and supports. Closed-cell rubber foam restricts moisture transmission through the material itself, but poorly bonded edges, punctures, and unsealed interruptions can still compromise the system. The sealing approach must match the insulation type rather than be copied from another material.
Required thickness depends on operating temperature, ambient temperature, and humidity; it cannot be chosen from nominal material thickness alone. Duct Insulation R-Value explains the relationship between thermal resistance, insulation selection, and thickness.
Final Installation Inspection
Inspect the completed duct insulation installation as a continuous assembly, not just for appearance. Look for loose blankets or boards, sagging, excessive compression, exposed metal, or missing coverage. Check longitudinal and circumferential wrap seams, board joints, and termination closures.
Where a foil facing or another vapor retarder is used, inspect taped laps, punctures, damaged areas, fastener penetrations, and seals around flanges. Confirm that outdoor assemblies have the specified weather and mechanical protection. For internally lined ducts, verify the air-stream surface, adhesion, mechanical retention, and protection of leading edges.
Check concealed locations before closing them, and repair any open joints, damaged surfaces, loose areas, or exposed cold metal before handover.
Choose Insulation Materials for Your Ductwork
Insulvora supplies foil-faced glass wool rolls, glass wool boards, and rubber foam boards for external duct insulation installation, with different thicknesses and facing options. Share your duct type, dimensions, operating conditions, and required material form so we can discuss suitable product specifications and project pricing.